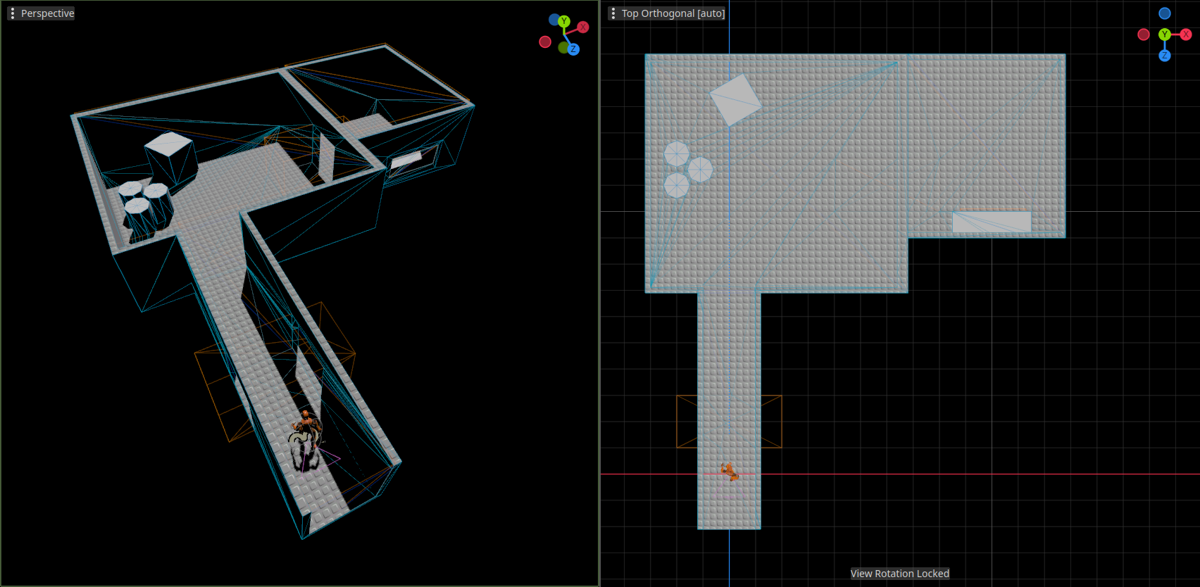
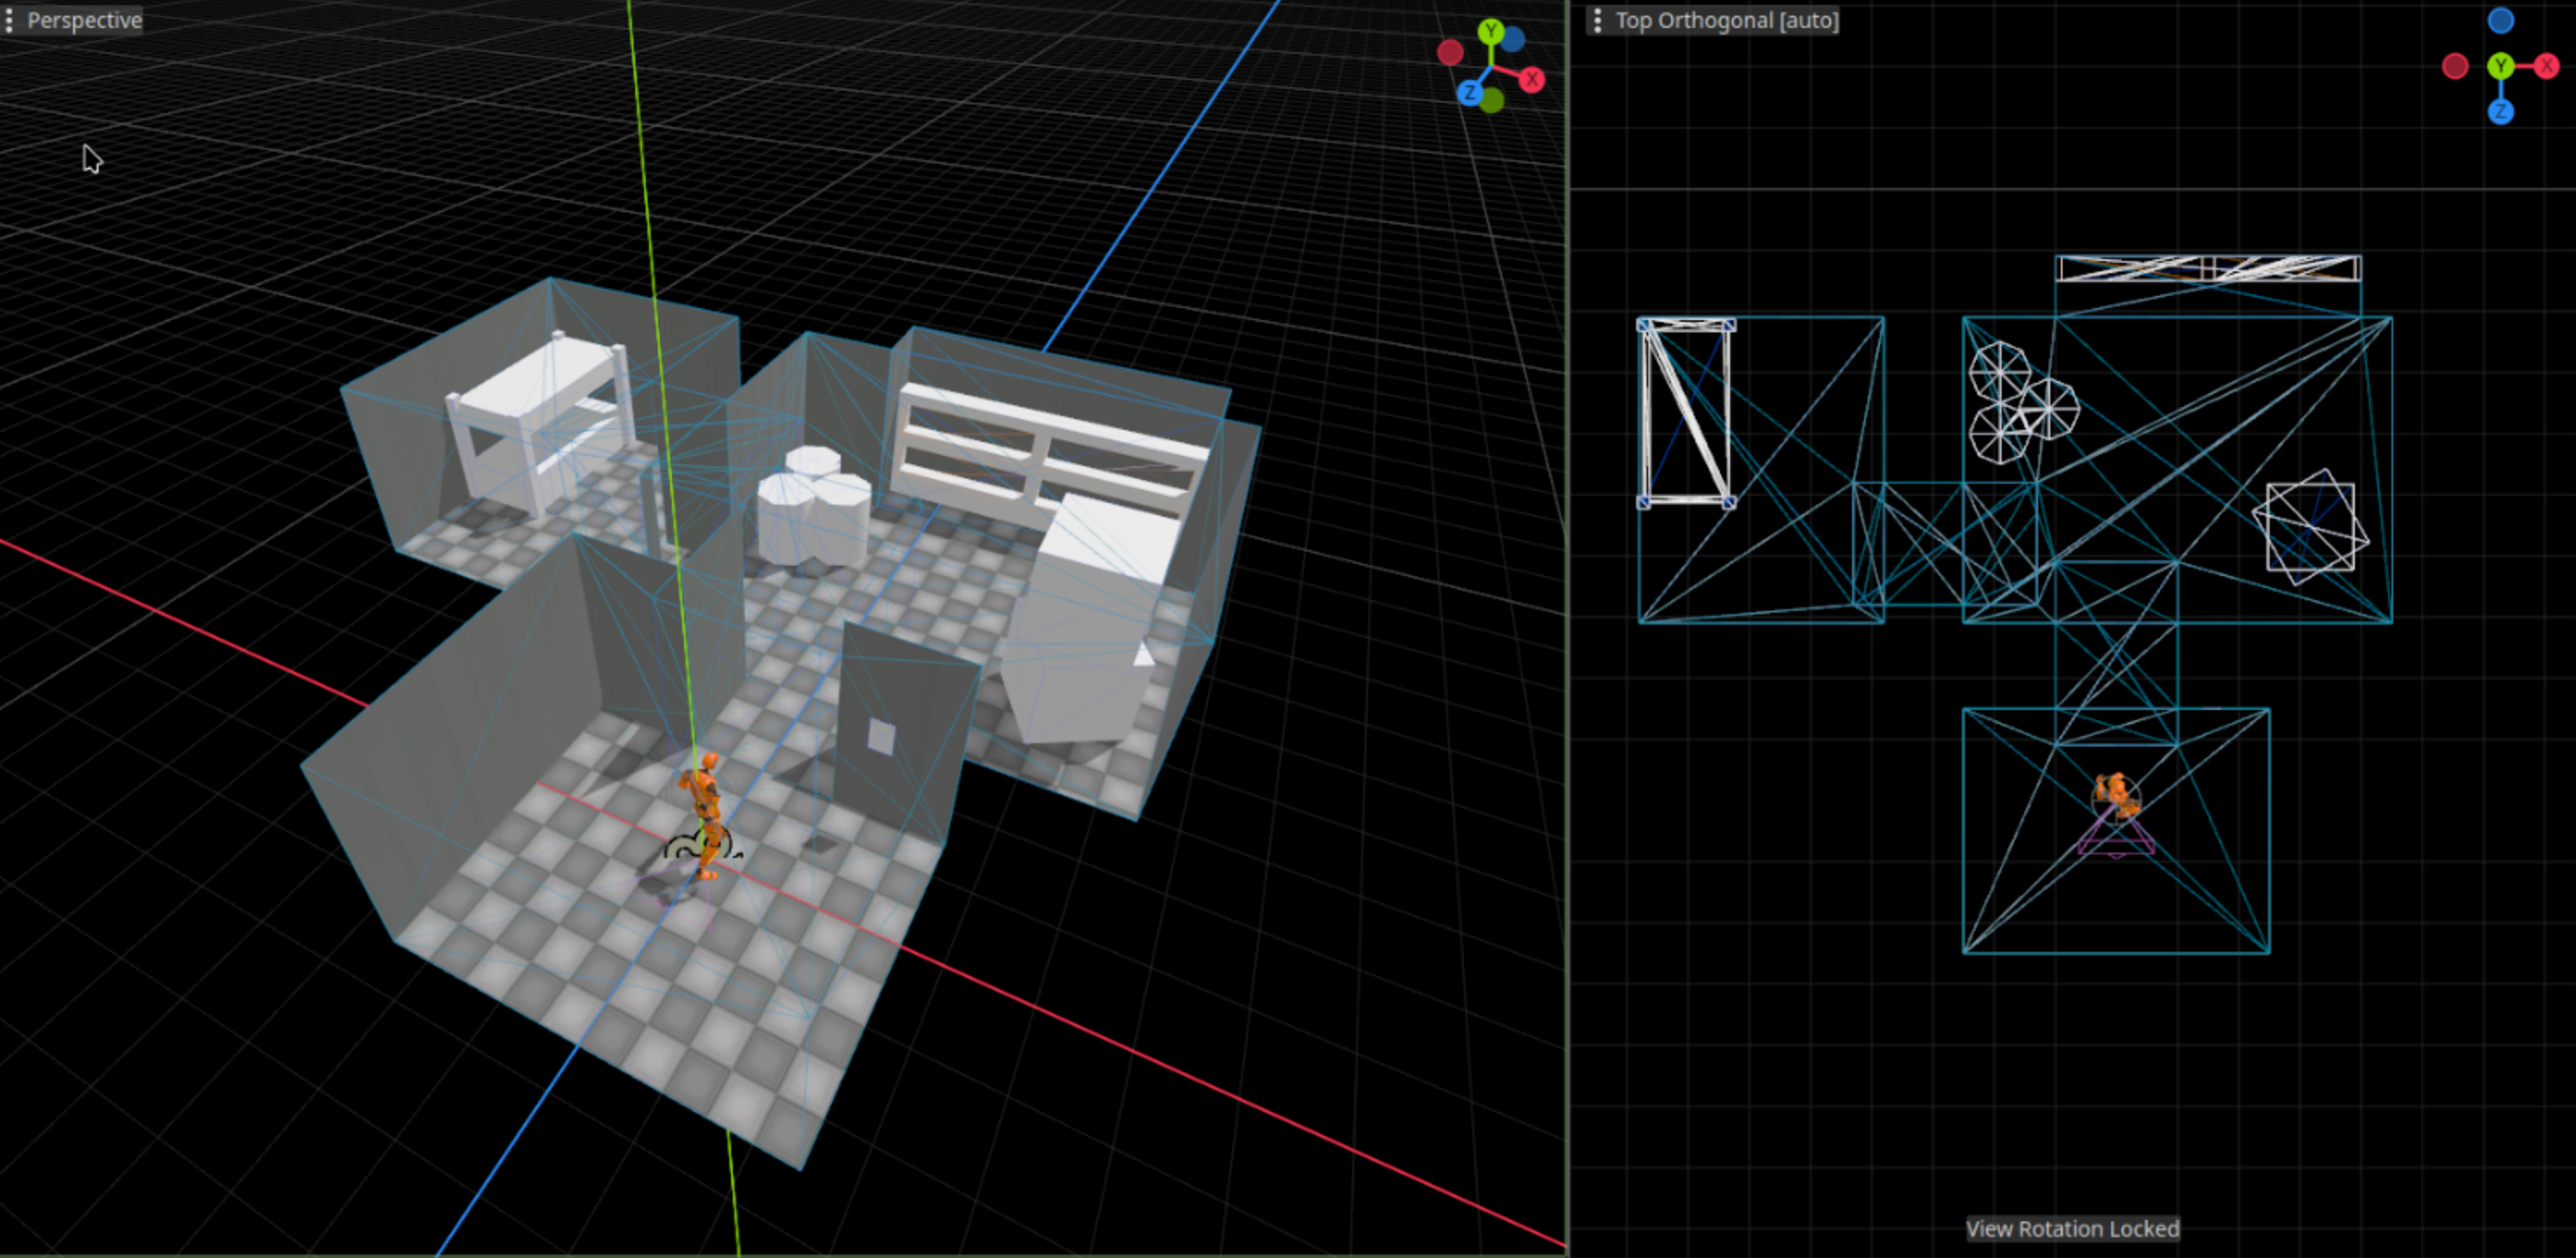
The idea is to use interconnected sections that are spawned dynamically rather than separate levels. This gives us better control and a smooth uninterrupted gameplay experience
Info
Godot’s scene system may seem misleading coming from other engines. Just think of them as containers that can hold anything from a single prop to an entire building. We’re breaking down our space into chunks.
Check Godot Documentation for more info
Prototyping
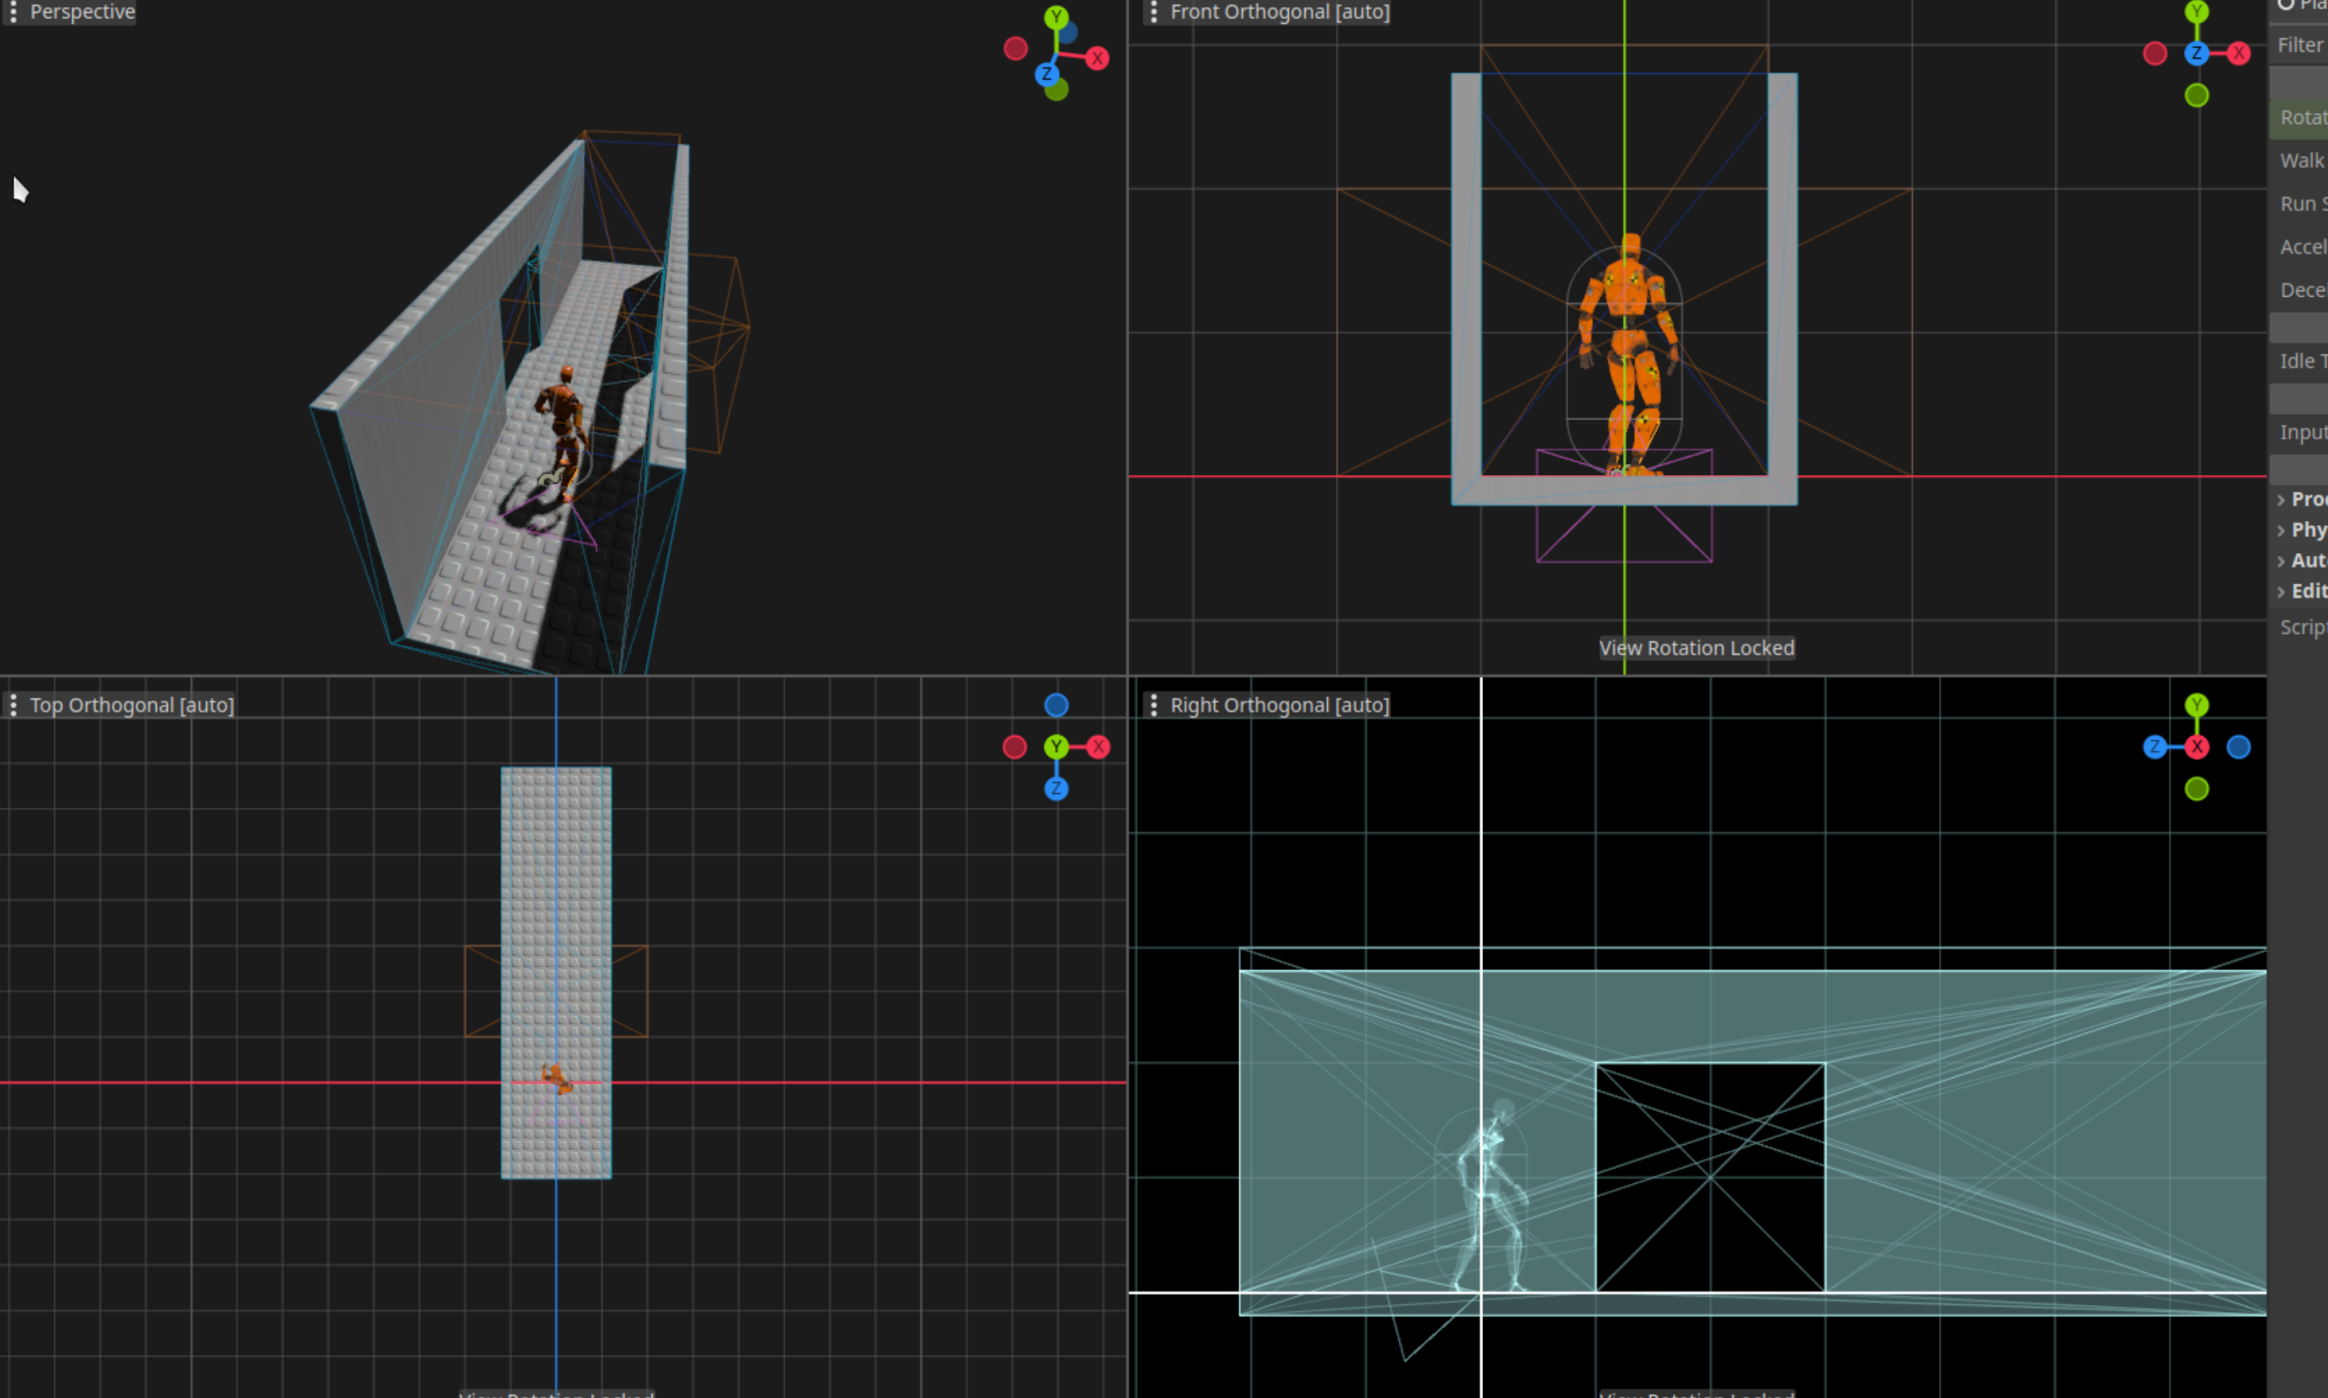
Start by duplicating scenes/building.tscn into your scenes/sections/ directory. This template gives you a basic setup to start blocking out the space, including a split perspective/top view layout.
Use CSG to build the room, it allows you to quickly carve out rooms, hallways, and other architectural features without getting bogged down in detail work. We use inverted boxes for interiors, this reduces the number of objects needed and automatically handles interior geometry
Depending on the scene, you might need to:
- Add connectors at outgoing points (marked green for entrance, red for exit), you don’t need this if the scene only has one entrance.
- Set up Triggers
Suggestion
After you finish the layout of the section, lock it (CTRL + L) so it is easier to select relevant objects. OR in a cluttered area, use the “Show list of selectable objects” instead of the default select mode.
With the layout done you can experiment with the existing prop models, or mock them up in a separate CSGCombinator to avoid merging the geometry
Moving to Production
Once you’ve prototyped your scene in CSG, export it through Scene → Export as → GLTF. This file can then be brought into an editor like Blender for final geometry cleanup, UV mapping and texturing.
Exporting
 Use glTF Separate.
Note
Enabling Keep original will prevent Blender from duplicating external textures on export, so that you can directly export it to the project files. Handy if you’re just updating the model or using existing textures.
Appendix
Wall of text Ahead
In this section I describe my thought process as I experimented, ultimately leading to the outlined method above in this document
I began by trying to replicate the workflow I knew from the Hammer editor, used in games like Portal 2. I set up Godot’s editor with a similar 4-view arrangement, thinking it would be familiar and efficient.
This approach didn’t translate as well as I’d hoped. Here’s what went wrong:
- The overdraw mode was a mess. Everything turned blue, the axis handles used for moving objects became invisible. Switching to wireframe helped a bit: I could see edges and the axis handles were there, but it’s not perfect.
- Godot’s many panes ended up feeling cramped. With all of them taking up space it’s not optimal.
- Having the grid enabled on all axes made it hard to see in the perspective view. It was just way too cluttered.
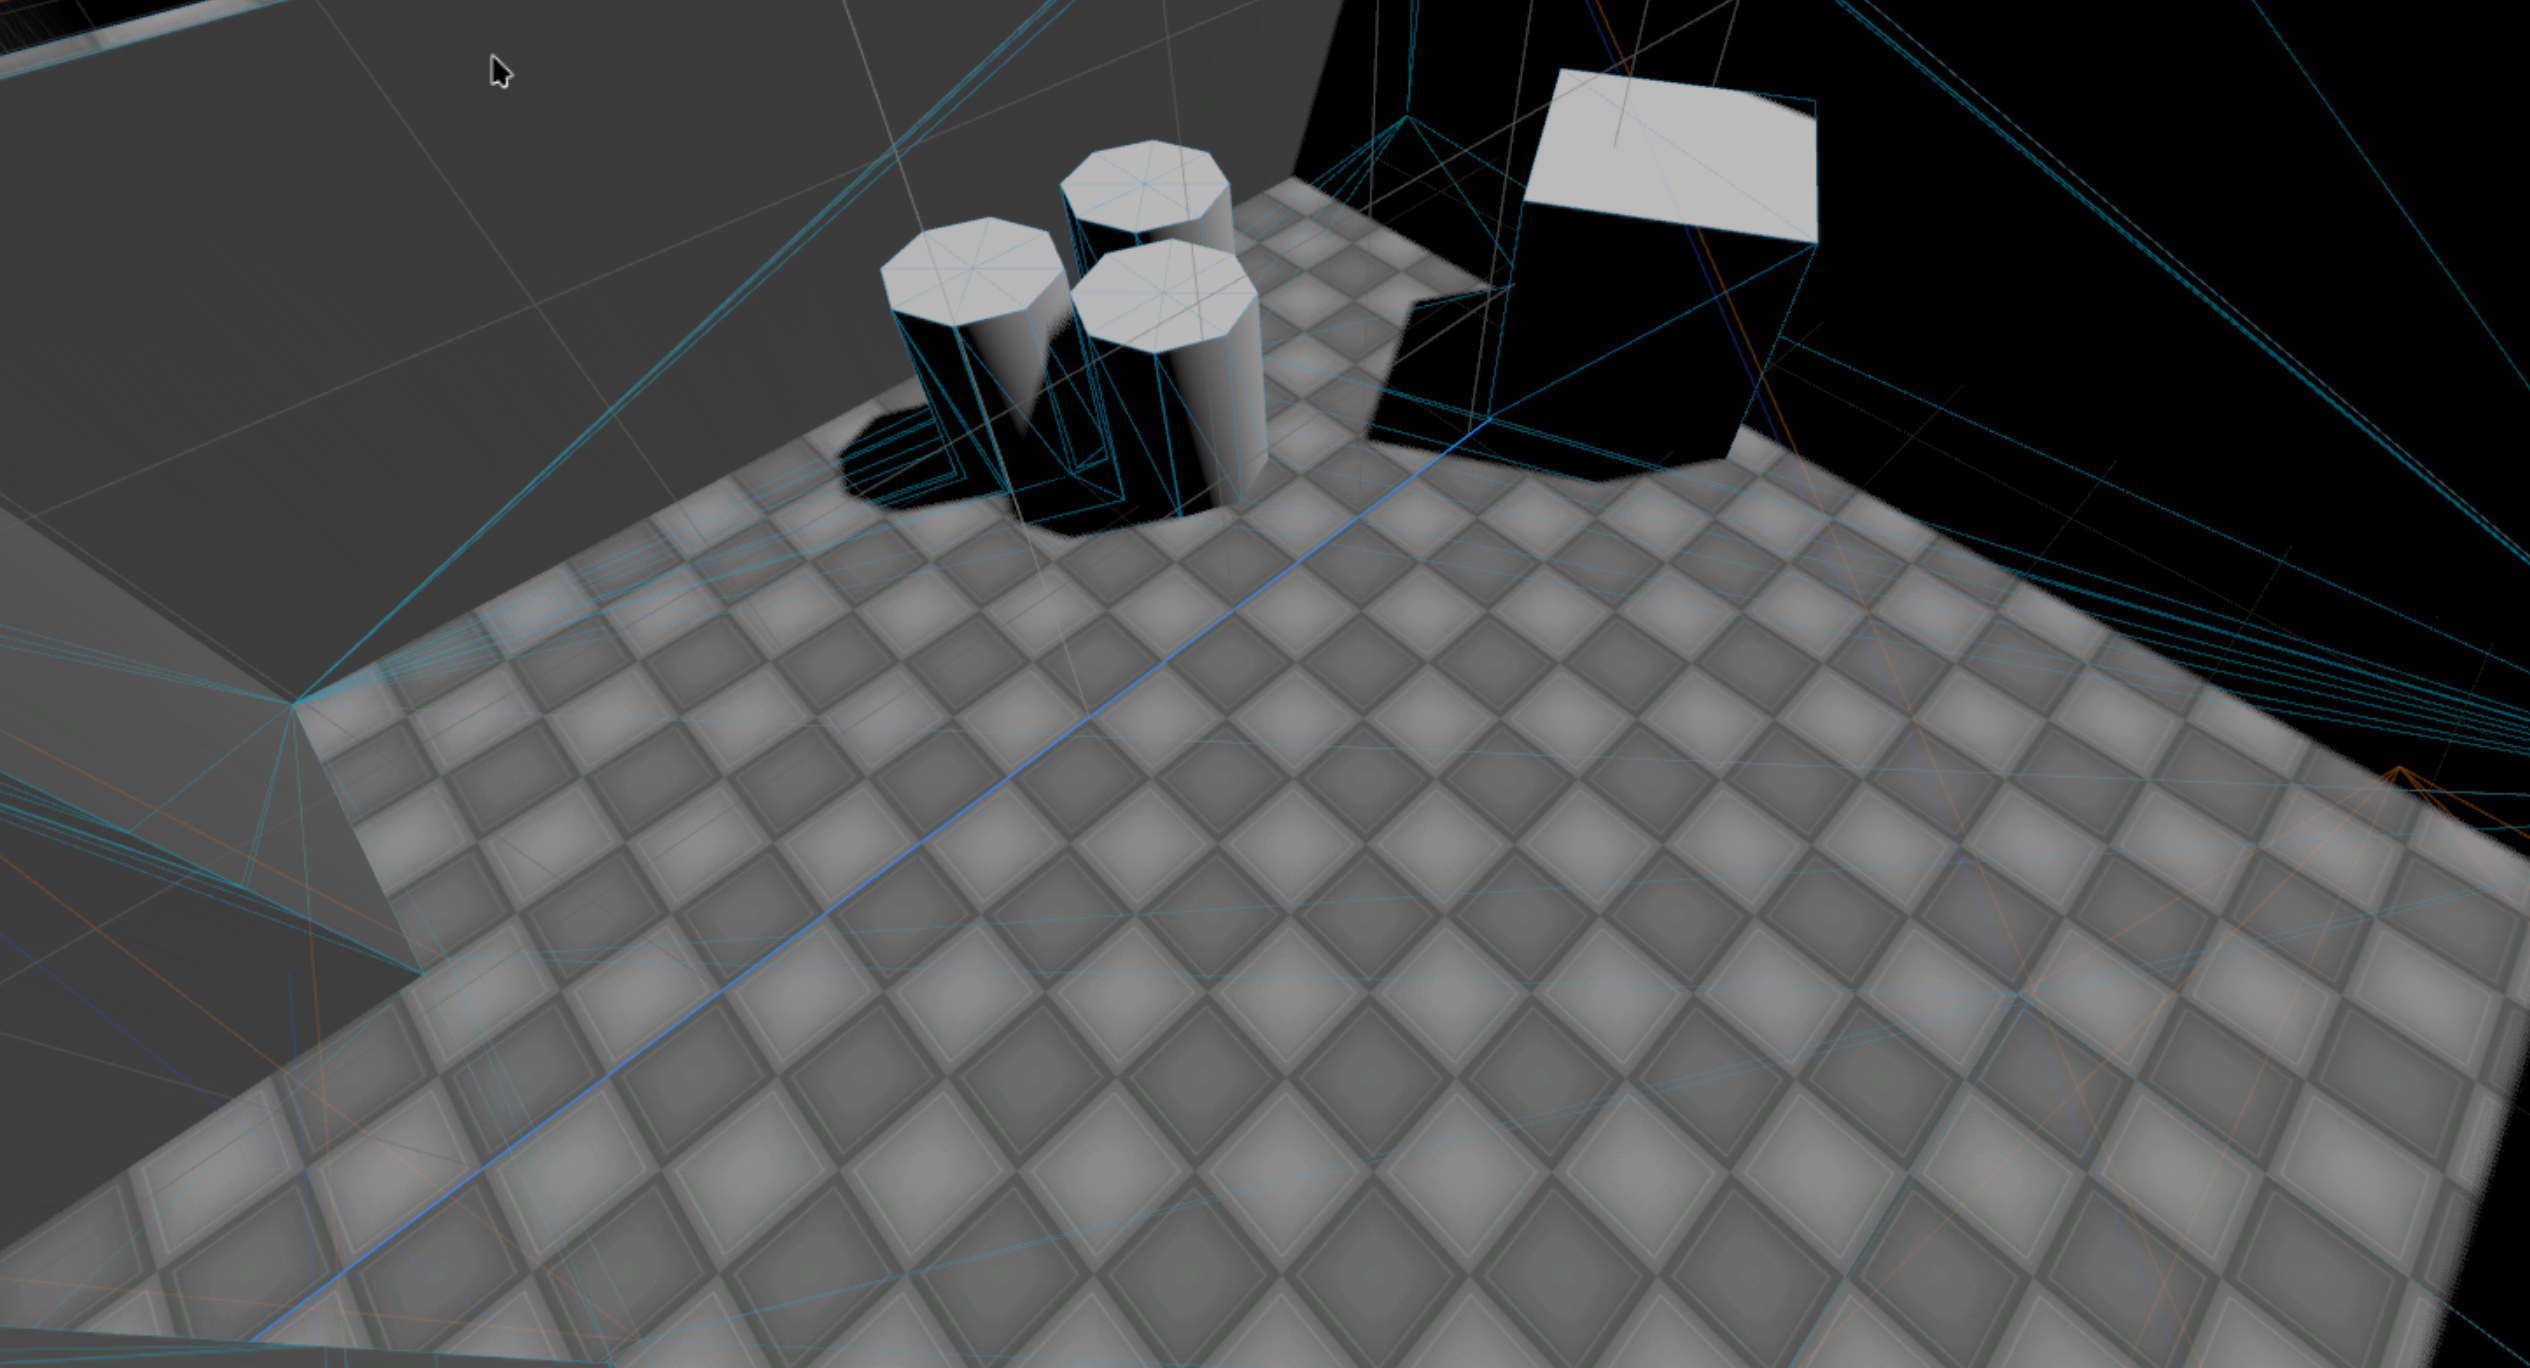
I turned off the grid in perspective view, trying another way to get better alignment. I thought a stud-like texture would be good, but it was too small, and scaling it made it too big or didn’t line up with edges.
Then I made a tile texture, and it worked much better for visual alignment. Here’s how that looked:
Note
I use the exact same texture on all CSG elements that make the room. To hide it on walls, I set the Y scale value to 0 (it becomes so small so it disappears). I keep props on a separate CSGCombinator, so as not to merge geometry by accident when there’s no need for it.
The real game-changer for building these rooms was inverting the CSG boxes. It does exactly what you probably might think. It seems obvious now, but I worried about physics problems initially. Turns out, there weren’t any. And it’s great for prototyping, connects rooms quickly, automatically optimizes geometry, and allows playtesting the layout right away. We’re talking about reducing a complex room from 30+ CSG boxes to just 6. Way fewer faces to render!
Tip
Maintaining just Perspective and Top views gives me all the spatial information I need: Top view for precise XZ positioning and Perspective for everything else with proper depth perception. This layout maximizes usable screen space while preserving all necessary viewing angles
Texturing in the editor???
So, now I could easily mock up rooms and props, Texturing was still a problem. Godot won’t let you texture individual faces of a CSG object, and there’s no UV unwrapping. There is a proposal for it, but it’s not available yet.
I first thought about writing code to pull out faces into their own meshes for texturing. But that sounds like a lot to deal with, especially when I’m not yet deeply familiar with Godot’s scripting.
I looked into plugins that could help, like Qodot, func_godot, and Cyclops Level Builder. But most are geared toward building in a retro blocky style for games resembling Quake, requiring software like TrenchBroom. I didn’t want us having to learn new software and also these plugins mentioned problems if Godot is updated which is not reassuring. Also, it seemed most plugins don’t change texturing much.
Advanced mapmaking just isn’t Godot’s forte. It’s meant to do a little bit of everything, so tools aren’t quite top-notch, just passable.
Even if I could handle basic texturing in Godot, Blender would still be needed for smaller visual details anyway. So we just export the CSG directly to Blender and do it there instead.
Finishing up a section
So, up until this point, we’ve used .GLB (glTF Binary) models. These are self-contained files. The problem is, Godot unpacks them into the very same folder where you put the file, whether or not they’re needed, which we didn’t know at the time. This creates a lot of duplicate textures and wasted space when we should really be reusing them across all sections, like a big library of assets.
There are two other glTF formats that Blender can export: Separate (.bin + textures + .gltf) and Embedded (.gltf + textures).
At first glance, Embedded seemed like the better option to work with. Less files overall. Unfortunately, turns out it’s the least efficient of the three, at least according to the Blender glTF extension. So much so, that it’s actually disabled by default in Blender.

So much for that idea. Separate files it is, I guess.
Connecting sections
Finally, this is where things get interesting! Connecting all these separate sections together rather than ever having to deal with the whole map at once.
There’s some good potential for fooling unsuspecting players with architecture tricks here…
The plan is to have each section built around the origin point of its own scene. And we always have an entrance at origin, probably facing -Z cuz that’s how Godot rolls. That entrance could be a door, or just an opening if the door is in the previous section. Doesn’t really matter as long as it’s there.
I made a visual helper that we can drag around It shows us where and how the next section will connect
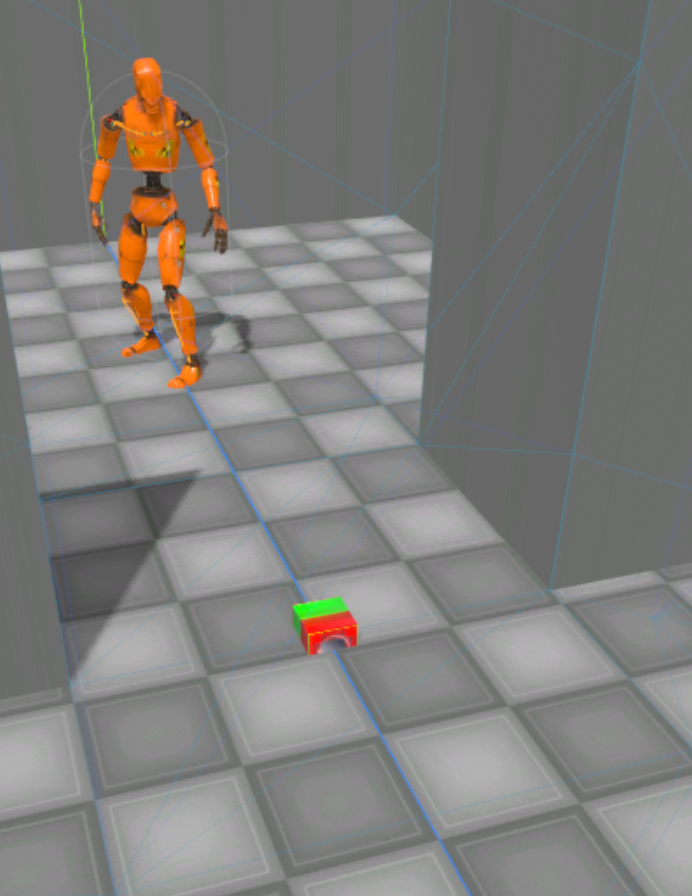
Green: in / Red: out Makes sense, right?
[…]
We can also use Triggers to unload or save before suspending other sections, it’s Important that the sections are not nested, otherwise you delete the section you’re in as well…